
It takes a combination of middle age and a love of gardening to find a barrow-load of homemade garden compost a peculiarly seductive sight.
Certainly my younger self would never have crowed with delight at the horticultural loveliness that is a well-made heap, or happily scooped up a handful to sniff and squeeze and better appreciate its dark, sweet-smelling, humus-rich, crumbly perfection.
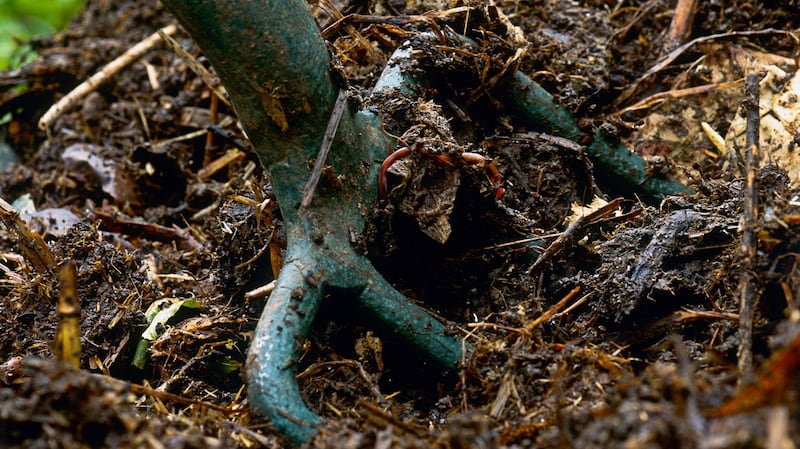
It’s not only the end result that I find fascinating, but the process too. The fact that a mix of vegetable peelings, grass cuttings, weeds (especially nettles), old banana skins, apple cores, seaweed, coffee grinds, soft green prunings, pet bedding (of rabbits, hamsters, guinea pigs and poultry), dead flowers, manure, cardboard, straw, paper towels, toilet roll tubes, woody prunings, fallen leaves, shredded newspaper, dead plants, spent potting compost, wood ash (not too much), egg shells, the contents of vacuum bags, hair and even human urine can be used to make the perfect compost within as little as 6-12 weeks is, I think, nothing short of magical. So is the fact that this same compost can be used to sustain soil health and fertility as well as bolstering plants’ immune systems and help them fight off pests and diseases.
Colloquially known as “gardener’s gold”, you can add homemade garden compost as a mulch to your vegetable garden, your mixed borders, or beneath your roses, your climbers, your fruit trees and onto your lawn, as well as to a homemade potting compost.
It can even be used to make compost tea (just soak it in a bucket of water for one to two weeks, aiming for a ratio of 1 part compost to 10 parts water) and then sprayed on plants in diluted form (again at a ratio of roughly 1:10) as a nutritious, health-enhancing foliar feed that makes the perfect pick-me-up for especially greedy, fast-growing plants such as tomatoes and sweet pea.
Further fuelling my appreciation is the knowledge, borne of bitter experience, that it takes discipline and a certain dedication to make the perfect compost heap, especially if it is to be hot enough to kill weed seeds and plant or animal pathogens.
It needs, for example, to be fed with the right ratio of carbon-rich material (or “browns” as these are sometimes called ) and nitrogen-rich material (or “greens”). Too much of the first and you’ll end up with a heap that’s very slow to rot down. Too much of the latter and you’ll get one that’s soggy and smelly. Opinions differ as to the ideal carbon/nitrogen ratio, but somewhere between 1:2 and 1:3 is considered best.
Its contents aside, your compost heap needs sufficient fresh air and moisture if the aerobic microbes are to do their all-important job of breaking down the material as quickly and efficiently as possible. In particular, too little air results in a sour-smelling, colder heap that’s slow to rot down and won’t kill weed seeds and pathogens, which is why it’s so important to regularly turn or rebuild it.
The size of the material in your compost heap will also affect the speed at which it breaks down. The smaller the better, especially when it comes to carbon-rich fibrous materials such as cardboard, straw, newspaper, plant stalks, woody stems and autumn leaves which should ideally be shredded or chopped up before being added.
Pre-mixing green and brown materials before adding them to the heap will also speed up the process and help avoid the common problem of particular ingredients forming a sticky or impenetrable layer (fresh lawn clippings being the perfect example).
Similarly, the size and design of your compost heap will make a difference to the finished result as well as to the ease with which you can turn it.
The larger three-bay systems require a steady and generous supply of suitable composting material and plenty of garden space, for example, but are an excellent way to stagger the process. While one pile is in the early process of “cooking”, the second, cooler pile is halfway though the composing process (typically this pile will be full of scarlet-red brandling or “tiger” worms) and the third is ready to use. These three-bay systems are usually made of timber and to waist-height, some with a wooden lid , others left open but covered with a protective, insulating layer of old carpet or plastic.
But you can even make a three-bay composting system out of straw bales, a system that the American organic grower and market gardener Eliot Coleman uses with great success. Straw bales not only insulate the heap but can also gradually be added to it as a carbon-rich ingredient as they begin to rot down.
More compact composting systems include the readily-available compost cones or “daleks”, which are much more space-efficient but are far more difficult to turn; the stackable beehive compost bins, which contain a series of trays and are decorative enough to sit happily in a small town garden; and the tumble-type bins, which require a certain amount of muscle.
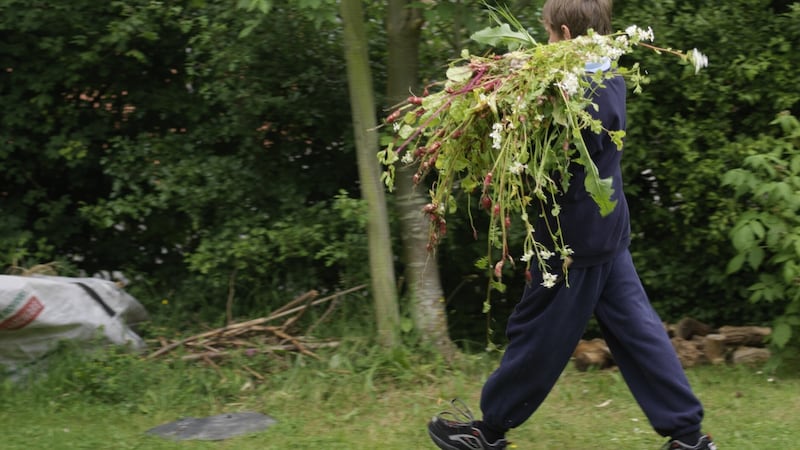
But whichever composting system you plump for, there are certain things you should never add to the heap including meat, bones, grease, dog or cat waste, diseased plant material and weeds that have set seed or that are have especially stubborn, long-lived root systems including bindweed, ground elder and scutch.
If you have a balcony or very small garden, then you’re unlikely to have sufficient space for a traditional compost bin.
In this case, you could use a wormery to transform your organic food and kitchen waste (both cooked and uncooked) into both a wonderfully crumbly black compost known as “vermicompost” or “black gold” and a highly nutritious liquid plant feed. Depending on the size of wormery used, it should be capable of processing the typical food and kitchen waste of one to four people and can be kept in a frost free-shed or indoors.
But be warned that wormeries take quite a degree of dedication to avoid accidentally overfeeding the worms and to create the right conditions for them (not too wet, not too acidic, not cold but not too warm).
Meanwhile, the Bokashi bin works via an anaerobic process of fermentation that quickly “pickles” kitchen and food waste (both cooked and uncooked) over 10-14 days to the point where it can be safely buried in the ground (although not placed in direct contact with plant roots for at least another 2-4 weeks ) or simply added to a normal compost bin.
Unlike conventional compost systems, it can be used for dairy, fish and meat products, and depends on the addition of an inoculated activator known as Bokashi bran to kick-start the process.
Again, it needs a certain amount of dedication and discipline to be effective. You have to make sure to compress the food waste in the plastic bin to squeeze out any air pockets, for example, and to regularly drain away the liquid produced, using the tap or spigot at the base of the container. You’ll also need two bins (once it’s full and inoculated, the first bin should be sealed with a lid and set aside to complete the pickling process).
But it’s a very space and time-efficient way to stop your food waste ending up as landfill and instead use it as a nature-friendly way to feed and nurture your plants.
Recommended online suppliers of compost bins, wormeries and bokashi bins include originalorganics.ie , quickcrop.ie and fruithillfarm.com as well as good Irish garden centres.
For further advice on composting and how to prevent food waste, see stopfoodwaste.ie
This Week in the Garden
If you grow peach or nectarine trees under cover of a polytunnel or glasshouse, then their blossom is probably beginning to open. As there are very few pollinating insects out and about at this time of year, to ensure a good harvest of fruit this summer you’ll need to give nature a helping hand. Use a small soft paintbrush (the kind you’d typically use for painting a watercolour rather than painting a wall) tied to a stick or bamboo cane to gently hand-pollinate the blossom, brushing it gently into the centre of each open flower so that it becomes dusted with pollen before moving on to the next. Ideally choose a bright day to this.
In milder gardens, mid-February is a good time to prune most kinds of roses. While particular pruning techniques will vary according to the particular type of rose (see rhs.org.uk for detailed advice or refer to a copy of D Hessayon's The Rose Expert), the basic rules hold true for all types: use a sharp, clean secateurs or loppers to cut out any dead, diseased or dying stems as well as some of the oldest stems. Also bear in mind that old, fallen leaves around the base of the plant can act as a Trojan horse in terms of infecting new growth with common rose diseases such as blackspot, so collect and destroy any that you find.
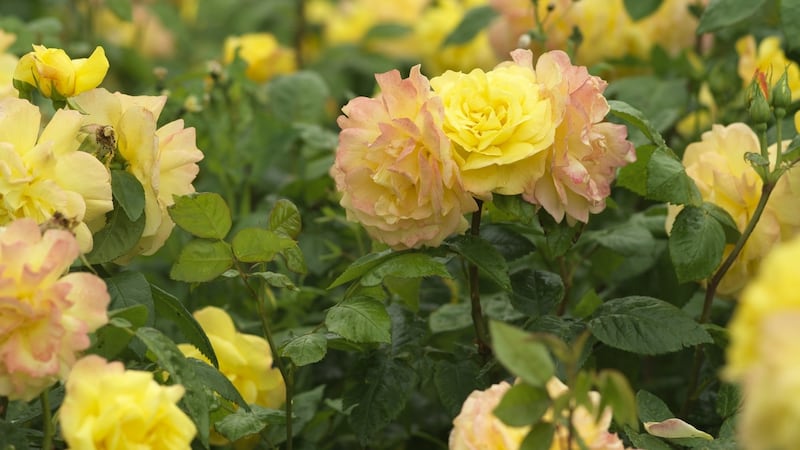
Come March, add a sprinkle of some slow-release fertiliser around the base of each plant (ideally an organic brand of fertiliser, such as OSMO Organic Rose Food, available from White's Agri whitesagri.ie)before finishing off with a shallow mulch of homemade garden compost or well-rotted manure, taking care to keep it away from direct contact with the stems.
Check dahlia tubers that are overwintering undercover to make sure that they are not drying out and that rot hasn’t begun to set in. Make sure to bin any that are showing obvious signs of decay as these can quickly infect healthy tubers. Remember that overwintered tubers need to be protected from both warm and very cold temperatures until the time comes to either divide and pot them under cover (March) or to plant them out directly into their final growing positions in the garden (May).
Now is also an excellent time to start ordering new dahlia tubers from specialist suppliers, while stock of hard-to-get/ fashionable varieties is still high.
Dates For Your Diary
Saturday 23rd February, The Crown Plaza Conference Centre, Northwood, Santry, Dublin 9. The Garden & Landscape Designers Association (GLDA) 2019 seminar, 'Gardening on the Edge; Rewilding Green Spaces', with guest speakers Dusty Gedge of the UK, Irish environmental consultant and wetland specialist Féidhlim Harty, American landscape architect Kevin Sloan, and Monique and Thierry Dronet of Jardin de Berchigranges in northeast France. Tickets from €55 (students), €85 (full members, Friends of the GLDA)), €100 (early bird non-members), €110 (non-members), see glda.ie
Tuesday 26th February, Foxrock Parish Pastoral Centre,Kill Lane, Dublin 18 (8pm). 'Plant Combinations' a talk by Joseph Atkins, head gardener of Aberglasney Gardens in the UK on behalf of Foxrock & District Garden Club, see foxrockgardenclub.com
Friday March 1st-Sunday March 3rd, Renvyle House Hotel, Connemara, County Galway. 'Spring Gardening Weekend' with practical demonstrations, workshops and illustrated talks by organic kitchen gardening expert and author Klaus Laitenberger, Kylemore Abbey head gardener Anya Gohlke and horticulturist, flower-farmer and Irish Times garden writer Fionnuala Fallon, plus a field trip to the walled gardens of Kylemore Abbey. €199 pps includes B&B plus evening meals, see renvyle.comor call 095-46100 for details.


