Even at a time when everyone is isolated at home, nervous about spending money and without an occasion to dress up, fashion can still be fun and a great way to pass the hours.
Simone Rocha, the Irish fashion designer known for her voluminous statement-making dresses and romantic yet rebellious collections, is spending lockdown at her home in London. Here she shares some print-and-keep instructions on how to jazz up a pair of old socks with a fluoro-marbled tie-dye print, finished with personalised embroidery.

“I often collect old cotton aprons and bibs in flea markets, so in recent weeks I’ve been able to repurpose them as tokens for friends, collaborators and family during my down time,” Rocha says. “I like to stitch names on pieces like this because we are in a time where everything human feels the most vulnerable, yet also the most important.”
“In the evenings it has been very therapeutic.”
Part 1: How to tie-dye socks
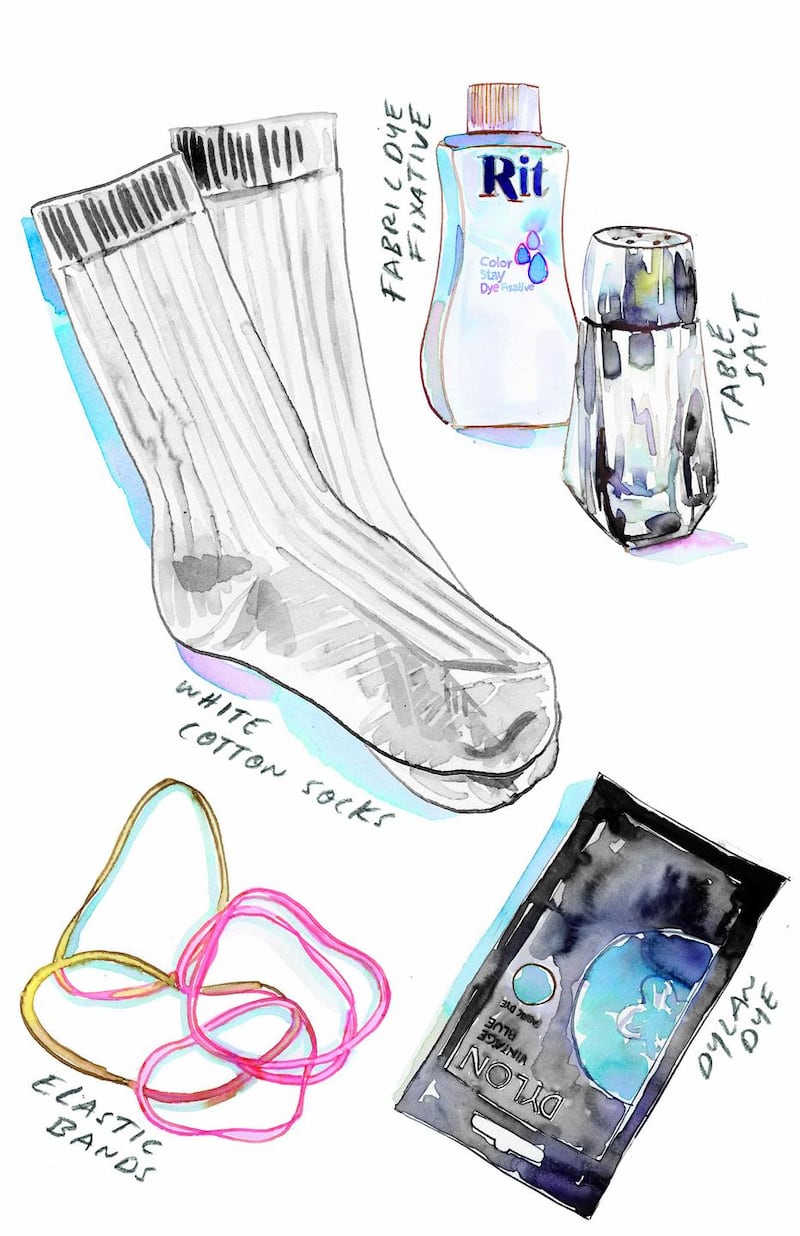
Your tool kit:
White cotton socks
One packet of Dylon fabric dye
Table salt
Elastic bands
Fabric dye fixative
Warm water and a bucket
Rubber gloves
Step 1: Start with a bucket of water and some elastic bands
Thoroughly wet your socks in the bucket. Wring dry.
Step 2: Wrap the socks in elastic bands
How you use the elastic bands on the socks will shape the tie-dye effect. One option is to twist the socks tightly into long, rope-like strands, then wrap them up into shell-like coils before pleating around them with elastic bands. "For a more random pattern, I used baking beans inside the sock and trapped the fabric with the elastic band to create polka dots," Rocha says. You will want to use three to four bands per sock.
Step 3: Add the dye, then wait
Add the packet of Dylon dye and a generous cup of table salt to the bucket of warm water. Submerge the socks in the bucket for at least two hours. The longer you leave them, the deeper the colour will be.
Step 4: Rinse and wash the socks
Remove the socks from the bucket. Remove the elastic band wraps and rinse the socks under cold water until it runs clear. Wash the socks on cold in the washing machine with a fabric fixative. Let them dry.
Part 2: How to embroider your socks
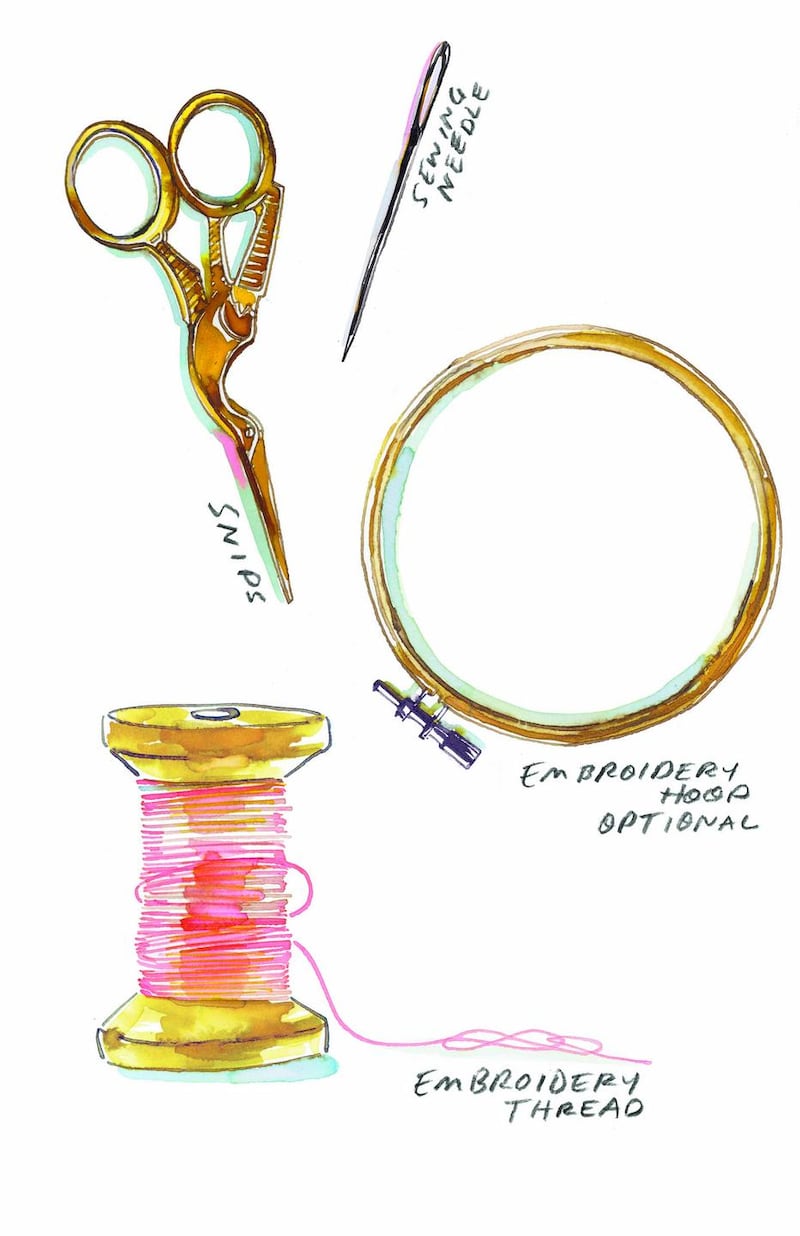
Your tool kit:
Embroidery thread
Sewing needle
Embroidery hoop (optional)
Pencil
Scissors
Step 1: Outline your pattern with pencil
"For the embroidery pattern on the socks, I used a classic chain stitch to spell names, although initials would also work as a less laborious alternative," Rocha says. A chain stitch is where you pull the needle through the loop into the next stitch. Start with drawing out the name on one sock – the easiest place to stitch will be at the top above the ankle. Use a light pencil, like a 2B, so it doesn't puncture the fabric and rubs off easily if you make a mistake.
Step 2: Thread your needle
Carefully thread the needle with your embroidery thread. The length of the thread should not be any longer than the length to your elbow when it's doubled. (This stops it from knotting up.) Snip, then tie a little knot where the two loose bits of thread meet.
Step 3: Start stitching
An embroidery hoop can be useful to keep your material taut when stitching into it. When sewing, be sure to start from the back, not the front.
Step 4: Do a chain stitch
Bring the needle up through the fabric at your starting point. Insert the needle again at the starting point and bring the tip up through the fabric a short distance away. Place the working thread behind the needle and pull the needle through the loop. Repeat. – New York Times